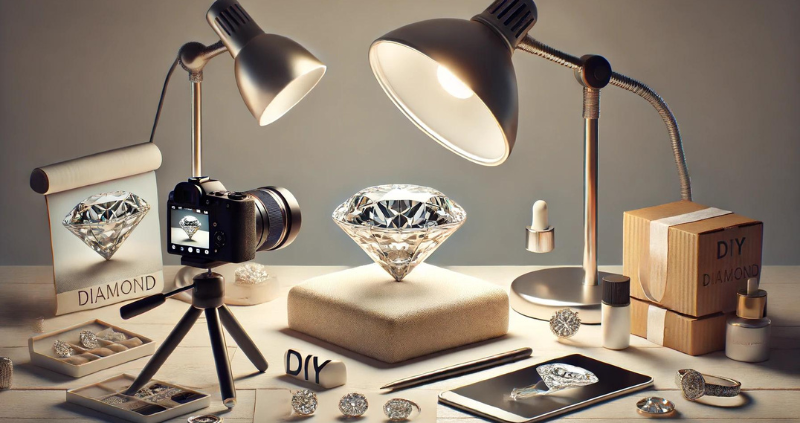
DIY Diamond Photography: Budget-Friendly Tips and Tricks
Photographing diamonds can be a challenging yet rewarding task. Capturing the true brilliance and sparkle of these precious stones requires specific techniques and tools.

Photographing diamonds can be a challenging yet rewarding task. Capturing the true brilliance and sparkle of these precious stones requires specific techniques and tools. Whether you're a jewellery seller looking to showcase your pieces online or an enthusiast wanting to capture your collection, these budget-friendly tips and tricks will help you take stunning diamond photographs.
How to Take Good Pictures of Diamonds?
Taking good pictures of diamonds involves several factors, including lighting, background, and camera settings. Here are the key aspects to focus on:
- Lighting: Utilise soft, diffused natural light by shooting near a window during the day. If natural light isn't available, LED lights with a colour temperature around 5500K are ideal for mimicking daylight. Additionally, using multiple light sources can help minimise shadows and evenly illuminate the diamond.
- Background: Select a neutral background, like plain white or black, to make the diamond stand out. Ensure the background is smooth and distraction-free. A matte finish on the background material can help reduce unwanted reflections and focus attention on the diamond.
- Focus and Stability: Use a tripod to maintain camera stability, which is crucial for sharp images. Focus specifically on the diamond's table (top) to highlight its brilliance. Using a remote shutter release or the camera's timer function can further reduce the risk of camera shake.
- Camera Settings: A macro lens is perfect for capturing fine details. Set your camera to a low ISO to minimise noise and a small aperture (high f-number) to increase depth of field. Manual mode allows you to have full control over the exposure settings, ensuring consistent results.
How Do You Make Diamonds Pop in Pictures?
Enhancing the diamond's visual impact involves attention to detail and creative techniques:
- Reflection and Sparkle: Use a light reflector or a piece of white paper to bounce light onto the diamond, creating additional reflections and enhancing its sparkle. Silver or gold reflectors can add a warm or cool tone to the reflections, complementing the diamond's colour.
- Angle and Positioning: Experiment with different angles to highlight the diamond's facets. Slight tilting can capture more reflections and sparkle. Rotate the diamond slowly to find the angle that best showcases its cut and brilliance.
- Post-Processing: Photo editing software can enhance images further. Adjust brightness, contrast, and sharpness subtly to make the diamond stand out without overdoing it. Use tools like the clarity slider and selective sharpening to emphasise the diamond's facets and edges.
Why Are Diamonds Hard to Photograph?
Photographing diamonds presents several challenges due to their unique properties:
- Reflective Surfaces: Diamonds reflect light in many directions, creating bright spots and glare that obscure details. Managing these reflections requires a well-thought-out lighting setup.
- Small Size and Detail: The intricate details of a small diamond need precise capture. Any slight movement or incorrect focus can result in blurry or dull images. A focus stacking technique, where multiple images at different focus points are combined, can ensure all facets are sharp.
- High Transparency: Diamonds' transparency can make them blend into the background or appear less vivid, making it tricky to highlight their clarity without losing detail.
Steps to Follow for Perfect Diamond Photography
Here’s a comprehensive guide to photographing diamonds effectively:
- Prepare Your Equipment: Gather your camera, tripod, macro lens, LED lights, and background materials. Clean the diamond to remove any dust or fingerprints. A lens cleaning kit can ensure your camera lens is free of smudges and dirt.
- Set Up Background and Lighting: Place the diamond on a neutral background. Position LED lights at 45-degree angles for soft, even lighting, and use reflectors to enhance sparkle. Diffusers can help soften the light, reducing harsh shadows and glare.
- Adjust Camera Settings: Set the camera to a low ISO (100-200) and a small aperture (f/11 or higher). Ensure stability with a tripod and use a remote shutter release or timer. Experiment with white balance settings to ensure the colours of the diamond are accurately represented.
- Focus and Shoot: Focus on the table of the diamond and take multiple shots from different angles to find the best perspective. Bracketing exposures can help capture the perfect balance of light and detail.
- Review and Edit: Select the best photos and use editing software for subtle adjustments to enhance the diamond's brilliance and clarity. Cropping can help focus attention on the diamond, and using vignettes can subtly darken the edges of the photo to draw the eye inward.
Photographing diamonds doesn't have to be expensive or complex. With the right techniques and a bit of creativity, you can capture stunning images that showcase the true beauty of your diamonds. By following these budget-friendly tips and tricks, you'll be able to take professional-looking diamond photos that dazzle and impress.
Welcome to GA Demands! Discover budget-friendly tips for DIY diamond photography. Learn how to capture stunning, professional-looking diamond photos without breaking the bank. Let's make your diamonds shine!

